Nowadays, user data is highly restricted by browsers, which results in large data gaps and makes it difficult to track customer journeys. Moreover, ad blockers are used by most users and don’t accept cookies when they visit the website.
So, whether you have GA4 for your Magento 2 website, that doesn’t mean you’ll be getting all the data. Don’t fret! We have a perfect solution for you.
We provide a way through which you’ll be able to access all the data there is; it’s called server-side tracking, and how to set it up for tracking in Magento 2. In addition, MageDelight also provides GTM, i.e., Google Tag Manager, with the extension to do the same.
Before that, let’s understand what is server-side tracking?
What is Server-Side Tracking?
Server-side tracking, a.k.a server-to-server tracking, is a system that runs on server-side. This allows you to fire-tracking pixels and codes from your server instead of the user’s browser. Thus, the server fires tracking pixels and is in direct consonance with Google Analytics through GTM.
Moreover, GA4 doesn’t run in users’ browsers it runs from the GA4 server.
Now, let’s learn about client-side tracking to understand server-side tracking better.
What is Client-Side Tracking?
Client-side tracking, also known as browser-based tracking. Here, the browser fires tracking pixels and codes and then communicates with GA4 and GTM. With these third parties, cookies are stored in the user’s browser after the GTM JS is executed. Then, the data collected from the cookies is transferred to GA4.
This is the conventional way of data getting tracked. But there is a major drawback. Most of the time, users either don’t accept consent to cookies or use ad blockers, due to which there is a high chance of data not getting collected and transferred to GA4.
Benefits of Server-Side Tracking
Now, it might be getting clear to you why data would be missing from your reports. So you must be more than ready to set up GA4 server-side tracking for your Magento 2 eCommerce store. Here are some of its benefits:
- Server-side tracking can’t be blocked by web browsers and ad blockers, due to which data can be captured effectively.
- You’ll have complete control of the data sent to Google.
- Data gaps created by browser-based tracking can be filled with server-side tracking.
- No tracking code needs to be fired from the user’s browser; as a result, website speed is improved.
- Track conversions with precision by implementing API-based conversion tracking.
How to Enable Server-Side Tracking in Magento?
I know it seems like a complex concept to understand. But it doesn’t matter till you are getting all the data, Right?
Hence, we come to the prime section of our guide. Server-side tracking can be enabled in Magento 2 using custom GTM loaders or GA4 protocol. Let’s understand it in more detail.
GA4 Measurement Protocol
One of the simplest ways to enable server-side tracking for the Magento 2 website is GA4 Measurement Protocol (MP). There are just some rules you need to follow in order to send raw event data from your server to GA4 properly.
With GA4 MP, you can send events directly from your server to the Google Analytics server through HTTP requests. It can be set up without any technical knowledge. Just follow these steps to set up GA4 server-side tracking:
1. Create Measurement API Secret
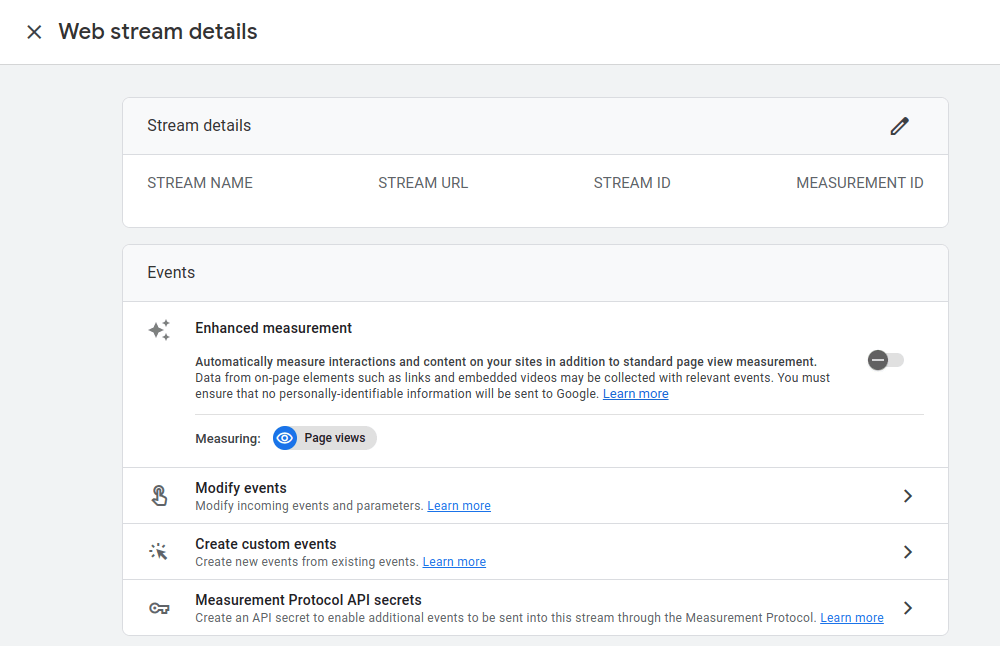
Step 1:
Log in to your Google Analytics account > go to Admin > select Data Streams, select a data stream, and find the MP API Secrets.
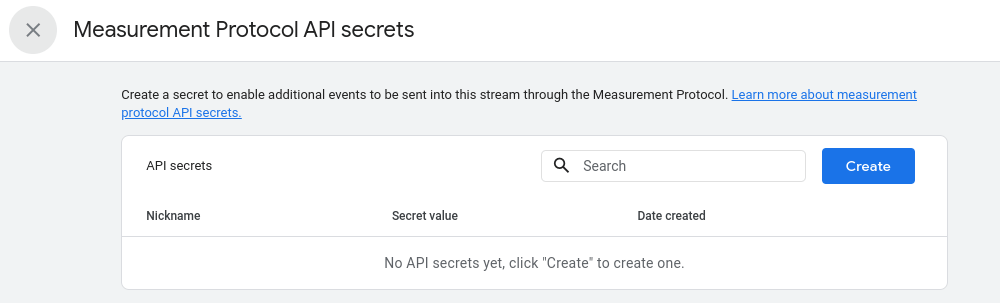
Step 2:
Click on Create from the MP API Secret Panel.
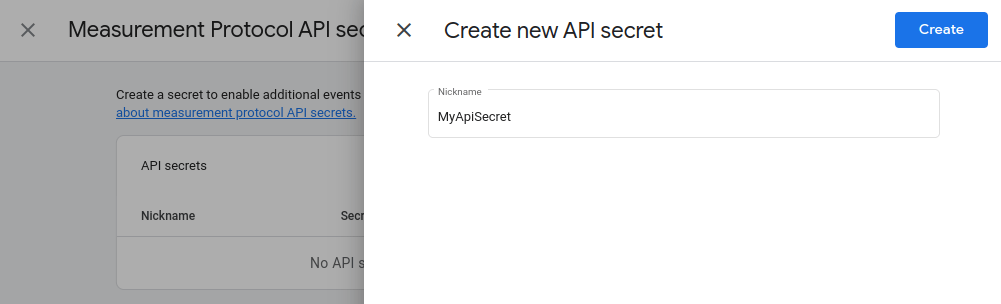
Step 3:
Give a nickname to your API Secret and click on the create button.
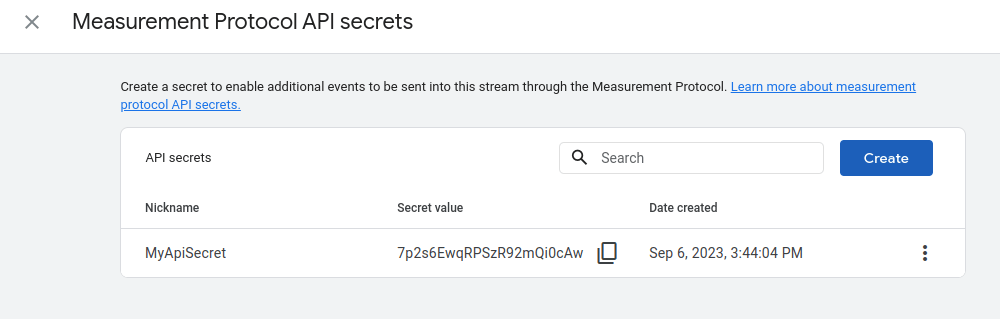
Step 4:
Once the API secret is created, it will appear on the grid. Then, copy the secret value and move to the next step.
2. Set-Up GA4 in Magento 2
Step 1:
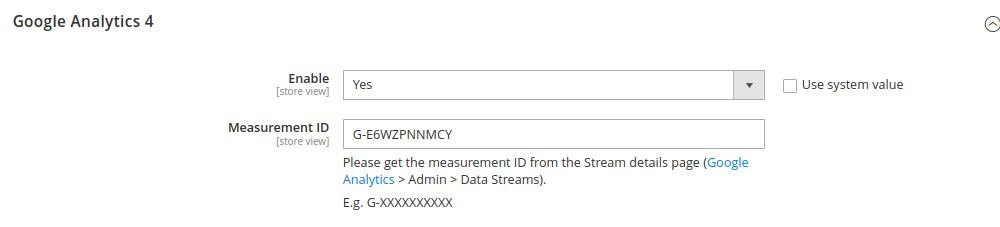
Go to your Magento Admin Panel. Then go to Stores > Configuration > GTM and Analytics > GA4
Now, enable GA4 and set the Measurement ID.
Step 2:
Now, in the Measurement Protocol option, enable it and copy and paste the API Secret in the next field.
Following these steps will enable GA4 server-side tracking. Now, let’s look at another method of activating GA4 server-side tracking.

Custom GTM Loaders
You can still enable server-side tracking in Magento 2 if you are using custom GTM loaders. Follow these steps:
Step 1:
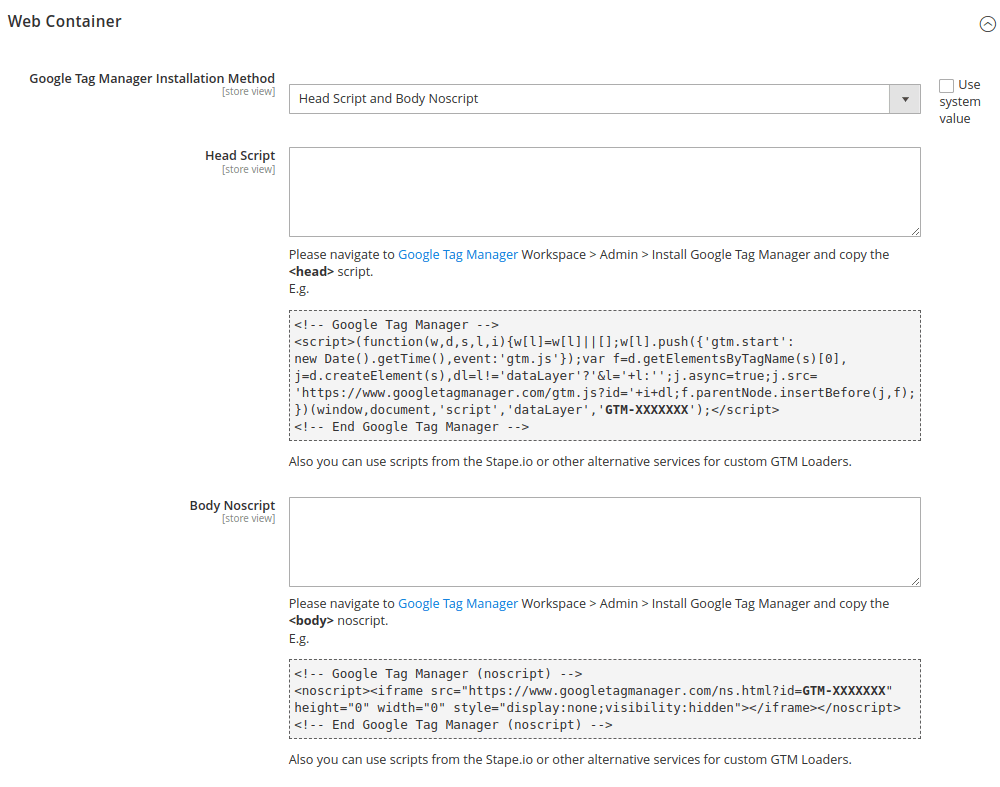
Go to the Web Container section of the GTM section and enable the Head Script and Body NoScript as the Installation Method for GTM.
Also, paste your custom Head Script and Body NoScript in the corresponding fields
Step 2:
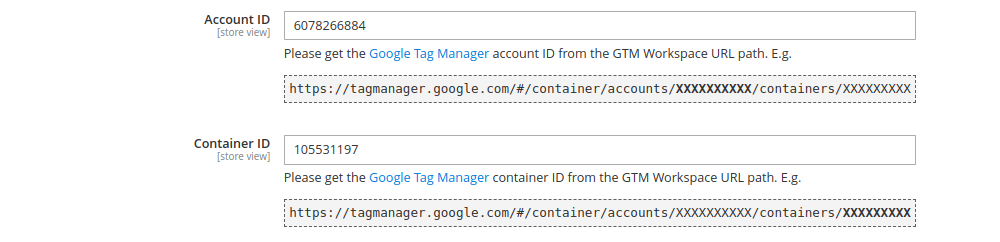
Now, specify your Account ID and Container ID from the GTM account.
Step 3:
Now, enable GA4 and feed the Measurement ID for it. Now, save it, and Google Analytics will collect data this way.
This way, you can enable GA4 server-side tracking using custom GTM loaders.
Wrapping Up
Now, with these two methods, you can enable GA4 server-side tracking and collect all the data even though users are using ad blockers or not accepting cookies. Effectively collect data with GA4 and get an accurate analysis of the data.